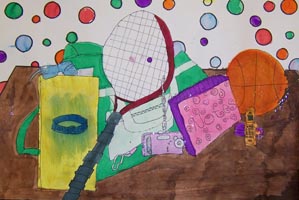
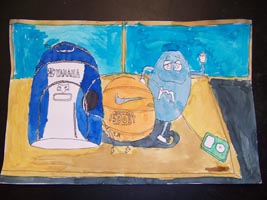
Examples of 7th Grade Personal Object Still Lifes
 |
 |
 |
 |
 |
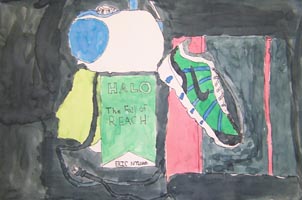 |
Personal Object Still Life
Activity: Still Life: Arranging,
Sketching, Painting
Video: Looking at Painting,
Program 1: “Realism”
Grade Level: 7th grade
Length of Lesson: 4 class periods
Web Site Resources:
Sheldon Tapley: biography; five
paintings beginning at gallery page 27
Ann Tower: biography; five
paintings beginning at gallery page 58
Paul Cézanne: Two Apples on a Table
Concept/Objectives:
Students will:
1. Collect and assemble objects
for a still life.
2. Further their painting and
color-mixing skills.
Questions To Guide Your
Instruction
Ask these questions of your
students at the beginning of the first class period:
1. What is a still life?
2. Why would artists want to paint a still life?
[Answers might include the following: It is convenient; an artist can stay in
the studio and have complete control over the selecting, arranging, and lighting
of the objects; the arrangement can remain in exactly the same position for
long periods of time; it is easy to rearrange and modify the subject; it allows
a painter to try out different color schemes and techniques using the same
subject.]
3. What kinds of objects might be included in a still
life?
4. How can an artist organize a still life to prevent
it from being chaotic? [Answers might include the following: Select objects
with a theme in mind; choose one or two colors which appear on most of the
objects; limit the area selected for the final painting; use a variety of the
same objects.]
Critical Vocabulary:
Balance, color, contrast,
emphasis, form, line, movement, pattern, shape, space, still life, texture,
unity, value, variety
Instructional Strategies and
Activities
Initiate the lesson by viewing and
discussing the segments on Sheldon Tapley and Ann Tower. Compare and contrast
their approaches to painting still life’s, using the Questions To Guide Your
Instruction as a guide. Display prints or actual still life paintings that
depict a variety of objects and painting styles and techniques. Visit the web
site Gallery to view and discuss artworks featuring still life as subject
matter. Supplement with slides or transparencies of professional and student
artworks. Include works by the following artists:
* Sheldon Tapley
* Ann Tower
* Paul Cézanne
* Henri Matisse
* Georges Braque
* Pablo Picasso
* Juan Gris
* Janet Fish
* James Rosenquist
* Audrey Flack
* Georgia O’Keeffe
* Paul Gauguin
Gather a selection of many
different still life items to lend to students. Ask students to bring in
objects they will include in their own personal still life arrangements.
Instruct them to bring in some three-dimensional objects, rather than all
two-dimensional ones. Suggest that they choose items that are “treasures” to
them and that reveal something about personality—e.g., sports equipment,
things from their locker, band instruments, etc…
Have students go through their
items, plus items the teacher has in the room, and do the following:
1. Select a variety of forms—some curved, some
boxy.
2. Pick items of different sizes.
3. Choose objects that show variations in
surfaces—patterned, plain, smooth, textured, shiny, dull.
In groups have students create
their own still life at their tables. They should set objects at different
levels to create interest in all parts of the arrangement and drape a cloth or
scarf around or under the objects as a way to create visual movement and help
unify the objects.
Have students use a viewfinder to
find the part of the composition that looks best. Use the viewfinder both
vertically and horizontally. Remind them that their paintings will look more
stable if most of the forms and shapes are vertical and horizontal and that
they should balance any strong diagonal lines with objects going in the other
direction.
Have students develop the
painting, using watercolor either realistically or expressively. Before they
finish their paintings, do a critique where the students display their work and
analyze the compositions. Limit the time for this. (A good reference to help
guide them in this activity can be found in Chapter 3 of Brommer’s Exploring
Painting).
Materials
Still life objects
Viewfinder
Pencil
Water paint
Brushes
Drawing paper
Mixing palette
Water containers
Rags or paper towels
Drawing board with clips or tape
(optional)
Resources
Books, videos, and web site used
in this lesson:
* Brommer, Gerald F. and Nancy K. Kinne.
Exploring Painting. Worcester, MA: Davis Publications Inc., 1995.
* Clark, Gilbert and Enid Zimmerman. ART/design:
Communicating Visually. Blauvelt, NY: Art Education Inc., 1978.
* Gatto, Joseph A., Albert W. Porter, and Jack
Selleck. Exploring Visual Design. Worcester, MA: Davis Publications Inc., 2000.
* Ragans, Rosalind. Arttalk, Teacher’s
Wraparound Edition. New York: Glencoe Macmillan/McGraw-Hill, 1995.
* Looking at Painting, Program 1: “Realism”
* Looking at Painting, Program 2: “Expressionism”
* Looking at Painting web site Gallery
* Art talk, Fine Art Transparencies and
Instructor’s Guide. New York: Glencoe Macmillan/McGraw Hill, 1995.
Ideas
Having students bring in their own
objects helps them feel an ownership of the completed work: It is a painting of
their objects. The teacher-collected objects are just a backup.