Intro Step 1 Step 2 Step 3 Finished

Adding Images

What is the first image link you want on your navigation bar? I want my intro to come first, so in the Element Name box I name my element “intro”. You are required to fill-in the field Element Name.

In the project folder that you downloaded there is an Images subfolder that contains four separate intro gifs. Browse for images to connect to the four different states Up image, Over image, Down image and Over while down image.

Up image:
intro_up.gif
Over image:
intro_over.gif
Down image:
intro_down.gif

Over while
down image:

intro_overdown.gif

Fill in the Alternate Text box by typing "Index" just in case your images fail to load, or are accidentally moved.

Adding A Link

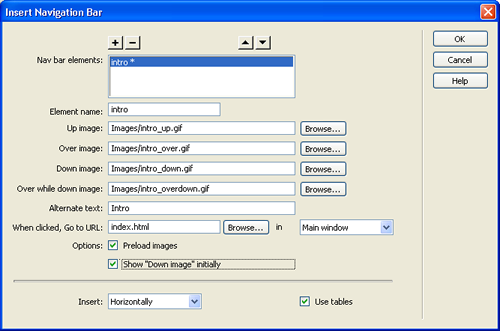
The When clicked, Go to URL box allows you to define what page your image will link to. We want the Intro button to connect to the website's primary page. Browse inside the Rollover_Demo folder you downloaded, and select index.html

Select Show "Down image" initially to indicate to readers that when the intro button is down, they are on your intro page (index.html.

When you are finished filling everything in, your dialog box should look like this.