Motion Tweening
MOTION TWEENING |
Motion Tweening is similar to shape tweening, although a little more complicated. It's what makes the animation that was seen on the intro page, and is very easy to do. Let's get started!
|
|---|
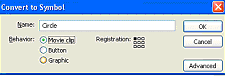
This image must converted to a movie clip in order to be animated! 4. Select Frame 10, and create a keyframe (F6 or Right-click) |
|---|
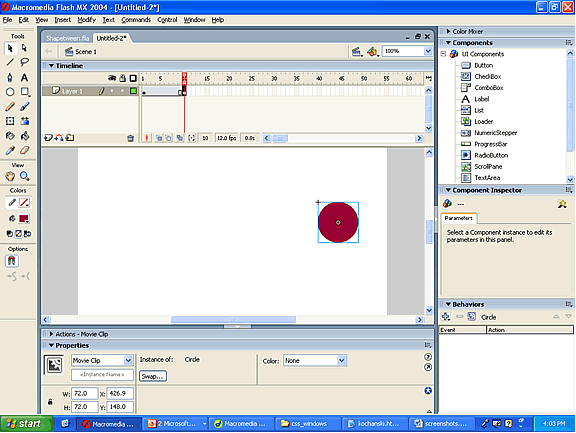
In the example above, the symbol is moved to the other side of the screen. 6. Click any frame between 1- 10, and in the properties tab set the Tween to Motion. Hit Ctrl+Enter to test the animation! Feel free to play around with different ways to change the animation -- this tutorial only outlined the beginning!
|
|---|