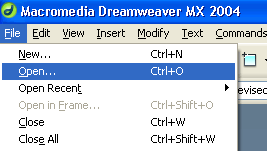
To create a Named Anchor in Macromedia Dreamweaver MX 2004 follow the steps below.

-
Begin by inserting a table at the top of the document. The content of the table will serve as the links to the Named Anchors within the document.
-
Place cursor at desired location
-
Choose Insert, Table
-
Enter 1 in rows box, __ in columns box (the number of columns will depend on the number of sections in your document that will receive a Named Anchor), for this tutorial our document is going to have 8 sections.
-
Click OK
-
Insert the section names of your document in the cells of the table
- Starting in the first cell enter:
- Overview
- Writers & Developers
- Audiences & Users
- Format & Organization
- Level of Formality
- Visual Cues & Images
- Range of Variation
- Forecast


- Now you are going to insert Named Anchors after each heading in the document (one Named Anchor for each section of the document).
-
Place the cursor after the first heading in the document, for this tutorial place the cursor after Overview
-
Choose Insert, Named Anchor
-
In the Anchor Name Box enter overview
-
enter name without any spaces or symbols, just letters, i.e. writersdevelopers
-
-
An anchor symbol will appear next to the heading
-
Also notice that the Property Inspector box at the bottom of the page is now displaying an anchor and a name box with the name of your first Named Anchor.
-
Repeat steps 1 & 2 for the remainder of the sections
![]()


- Save your changes after inserting all of the Named Anchors needed (select File, Save).

