![]()
![]()
![]()
![]()
FILE TYPES
Changing the overall size of an image is one way to get it ready for posting on the web. Deciding what file type to use is another method of optomizing an image. Here we will be dealing with JPEG and GIF files only as they are the file types read by most web browsers.
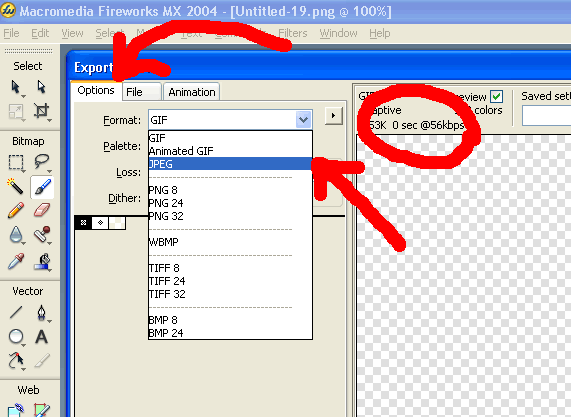
1. In the upper left corner of the export preview window, click the “options” tab.
2. You will now see two adjustable values in the upper left corner, labeled “format” and “quality”. Just below that you will also see “smoothing”.
3. First, select type and pull down to either Jpeg or Gif and watch to see how it changes your file size and download time, just as before. If you would like smaller file sizes you should probably use Jpeg.
4. Next, adjust the “quality” slider just below “format”. The higher the quality the better the image resolution. However, higher quality will drastically increase your file size.
Tinker with these settings until you have an image with a suitable size and downlaod time. If you are ready to make you image a file ready to post on a web page click the EXPORT button below.