STEP 3: ADJUSTING YOUR TABLE
STEP 3 |
|---|
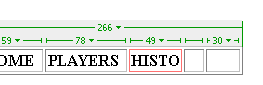
1. Once your table is on the screen, you will want to type the pre-selected titles into each box (See screen shot 1) a. Click on the first box in the table and type in HOME b. In the next box type in HISTORY c. The next one will be PLAYERS d. The fourth will be GAME SCHEDULE e. Finally, the last box will be titled STATS 2. Once you have your titles typed in you may need to adjust the individual box size to make it symmetrical a. Click on the table. If you move your cursor to the right edge of the table, arrows will appear, which you can use to adjust the size of your table. b. You will also see a grid of numbers appear along the top of the table which shows the width and height of the table, as well as each individual box (See screen shot 2) c. To adjust each individual box place your cursor on the line that separtes each box d. Click and drag the cursor to format each box accordingly. By now your table should be looking quite nice. 4. Save your changes |
SCREEN SHOT 1
SCREEN SHOT 2
|